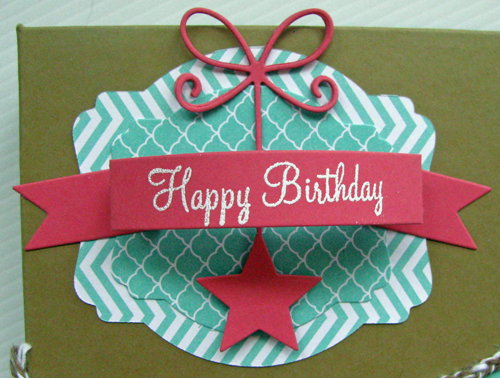
I have started wrapping the first of the presents I have purchased. The bauble colour theme for our tree this year is silver, white, pink and purple - Holly's choice. So I have followed through with the wrap.
This one looks lovely in the right light, which unfortunately I failed to capture in this photo!
Tuesday, December 10, 2013
Saturday, December 7, 2013
A new arrival
This little boy arrived last Friday and has been named Joffrey (Game of Thrones) by Holly. If you have watched the series you will know Joffrey is a nasty piece of work so I don't think it really suits this cutie! Here he is with his Mum.
He is extremely tall. These pictures were taken the day after he was born and it is hard to imagine his Mum was still carrying him yesterday. Mind you she had been spending a lot of time resting in the weeks running up to his birth, but who can blame her!
Settling down for a snooze in the sun.
He is extremely tall. These pictures were taken the day after he was born and it is hard to imagine his Mum was still carrying him yesterday. Mind you she had been spending a lot of time resting in the weeks running up to his birth, but who can blame her!
Settling down for a snooze in the sun.
Wednesday, October 30, 2013
A parcel for a friend
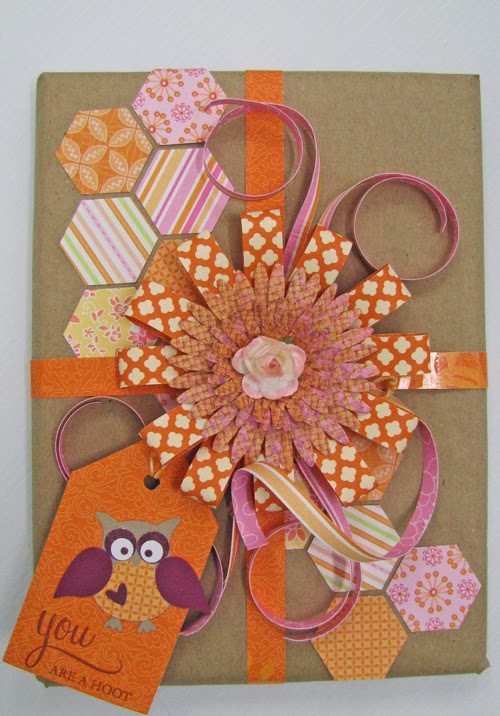
Here is a belated birthday parcel I made for my daughter to give to one of her friends. This is the second parcel I have wrapped using the hexagonal punch from Stampin Up! It is so useful for using up scraps of paper you have left over.
Tuesday, October 22, 2013
The scrap room transformation is complete
My wonderful hubby has spend the last few months building and installing custom made units for my scrapbook room and I couldn't be more delighted with the end result. The only thing I need to do to complete the job, is make the labels for the label holders to identify the contents of each drawer.
To see the whole room and the pictures of the transformation click on the "My scrap room" heading at the top of the page.
Monday, September 30, 2013
Gift bags
I have seen these little gift bags for sale but thought they were a tad expensive. Instead I bought a metre of calico for $3.99, brought my sewing machine out of hibernation and whipped up 12 bags, six each of two sizes.
The first one I stamped with pine cones and branches
and the second with holly leaves, berries and a flourish. Both of these bags use Waltzing Mouse stamps apart from the flourish which is Inkadinkadoo.
I took apart a small flat bottomed paper bag to make a template for myself and created this cute little gift bag. I should have take a side a side view to give you a better view, never mind I am sure you get the gist.
A close up of the tag, I double stamped the sentiment to give it a shadow.
The first one I stamped with pine cones and branches
and the second with holly leaves, berries and a flourish. Both of these bags use Waltzing Mouse stamps apart from the flourish which is Inkadinkadoo.
I took apart a small flat bottomed paper bag to make a template for myself and created this cute little gift bag. I should have take a side a side view to give you a better view, never mind I am sure you get the gist.
A close up of the tag, I double stamped the sentiment to give it a shadow.
Sentiment stamp - Waltzing Mouse
Star die - Memory box
Zig Zag edging and die cut for sentiment - Stampin Up
Paper - Collage Press
Saturday, September 28, 2013
Thank you card
Just a short post today with a card I made recently for a friend. My poor old punch is suffering, I now need to stand on it to get a better quality cut. I think it is time to throw it away and buy a new one, unless anyone has a good tip on how to sharpen it. I have tried the tin foil approach and have never found it particularly successful.
Stampin Up cardstock - Soft Suede and Baked Brown Sugar
Stampin Up ribbon - Soft Suede
Thank you stamp - Papertey Ink
Punch - Martha Stewart
Cream card, button and rose -unknown
Friday, August 9, 2013
Birthday packaging
It was my dear friend Christine's birthday on Wednesday of this week and she wanted Stampin Up! buttons. To start with I was just going to put them in a decorated bag but then decided I would make a purpose made box for them.
My photo of them does make them seem wonky but they do look better in the flesh.
Here is the card I made for Christine. Somehow I have failed to edit this correctly and the colours look a little dull, they are actually quite bright and cheery.
All products used were Stampin Up! other than those I have mentioned separately in the post.
The hanging star dies are from Memory Box, they are so cure, aren't they? I plaited the twine (The Twinery) before adhering it to the box because it is thicker it makes it easier to apply the adhesive.
I first cut the holes for the containers by drawing around them but realised when I assembled it that they needed a little more wriggle room in order to go in and out easily, so I had to take it apart and make them bigger. A good tip to remember if you are going to have a go at making it yourself.
My photo of them does make them seem wonky but they do look better in the flesh.
Here is the card I made for Christine. Somehow I have failed to edit this correctly and the colours look a little dull, they are actually quite bright and cheery.
All products used were Stampin Up! other than those I have mentioned separately in the post.
Subscribe to:
Posts (Atom)